I made my first linocut print with zero fingers lost
I’ve been putting it off because it always looked intimidating to me.
Well, I was overthinking it. The whole thing is simpler than it looks, and the kit costs almost nothing. I’m definitely not stopping here, so you can expect a lot more experiments in future posts.
How does it work?
You carve an image into a sheet of lino, roll ink onto whatever you didn’t carve, press paper on top, peel it off. Whatever you carve away stays the color of the paper, and the rest carries the ink.
What I used
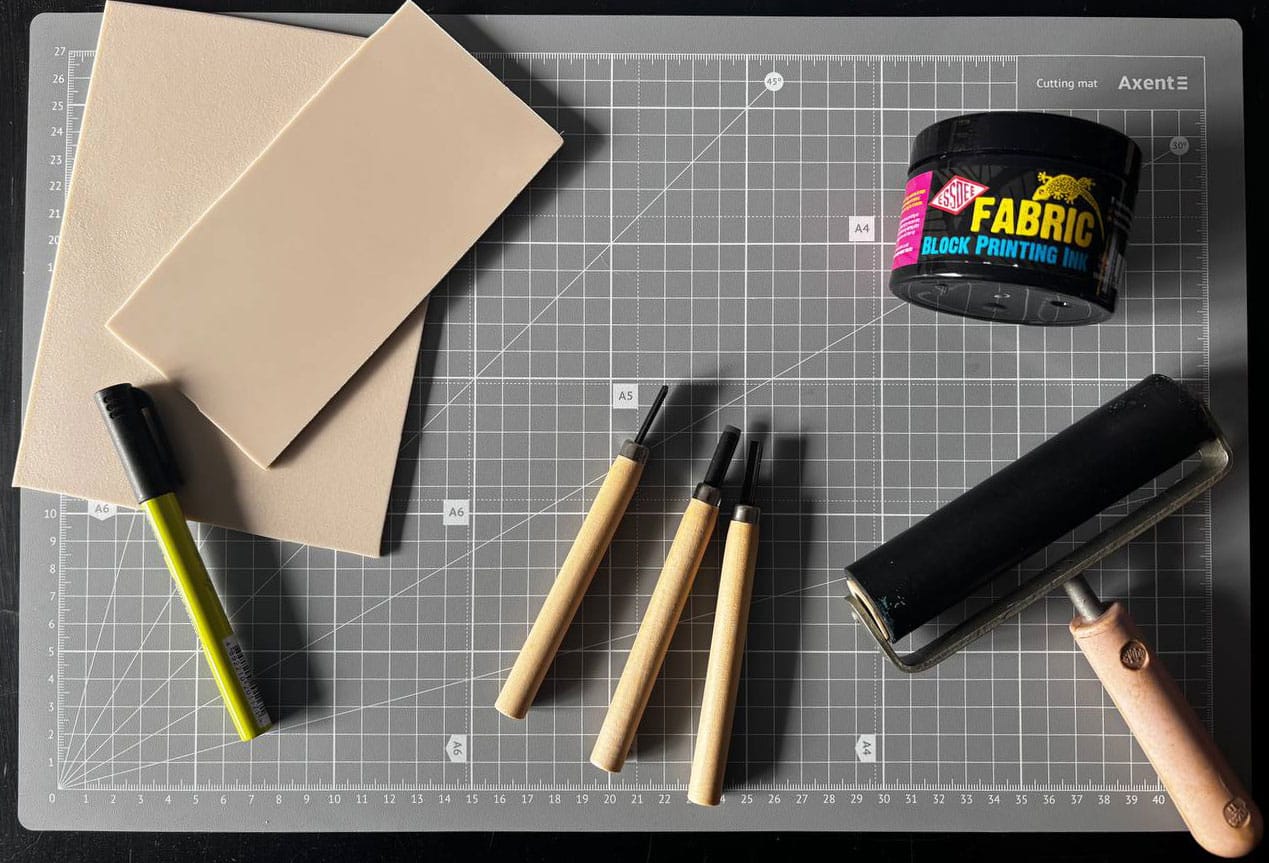
- Softcut Carving block A3 (3.0/SC3) ESSDEE. Reviews said it’s easier on day one but gets fuzzy on fine detail. Well, I don't have anything to compare it to, but this one was okay.
- A few sharp cutters with V- and U-blades.
- Block printing ink. I used one for fabric. Probably not the best choice, but who cares.
- Rubber roller. About 10cm wide is fine. Bought mine for 2 bucks on a flea market.
- Paper. Well, paper is paper, but you’ll get better results with something thicker. I just grabbed some from my drawing notebook.
- Something to press with. You can use your hands. And talking about hands – you better wrap a bandage around your fingers. The lino is slippery and your cutter will find a way through your skin. Just trust me on this.
- If you can draw, you can draw with a marker or whatever right on the lino. If you want to transfer a drawing, you might need copy paper.
The whole kit cost me around $15. It looks like a lot of gear, but you really need to buy a few tools and you can use them for dozens of different prints.
What you don’t need: A dog sitting near you, loudly breathing because you’re late for the evening walk. Sorry Shellie...
Think backwards
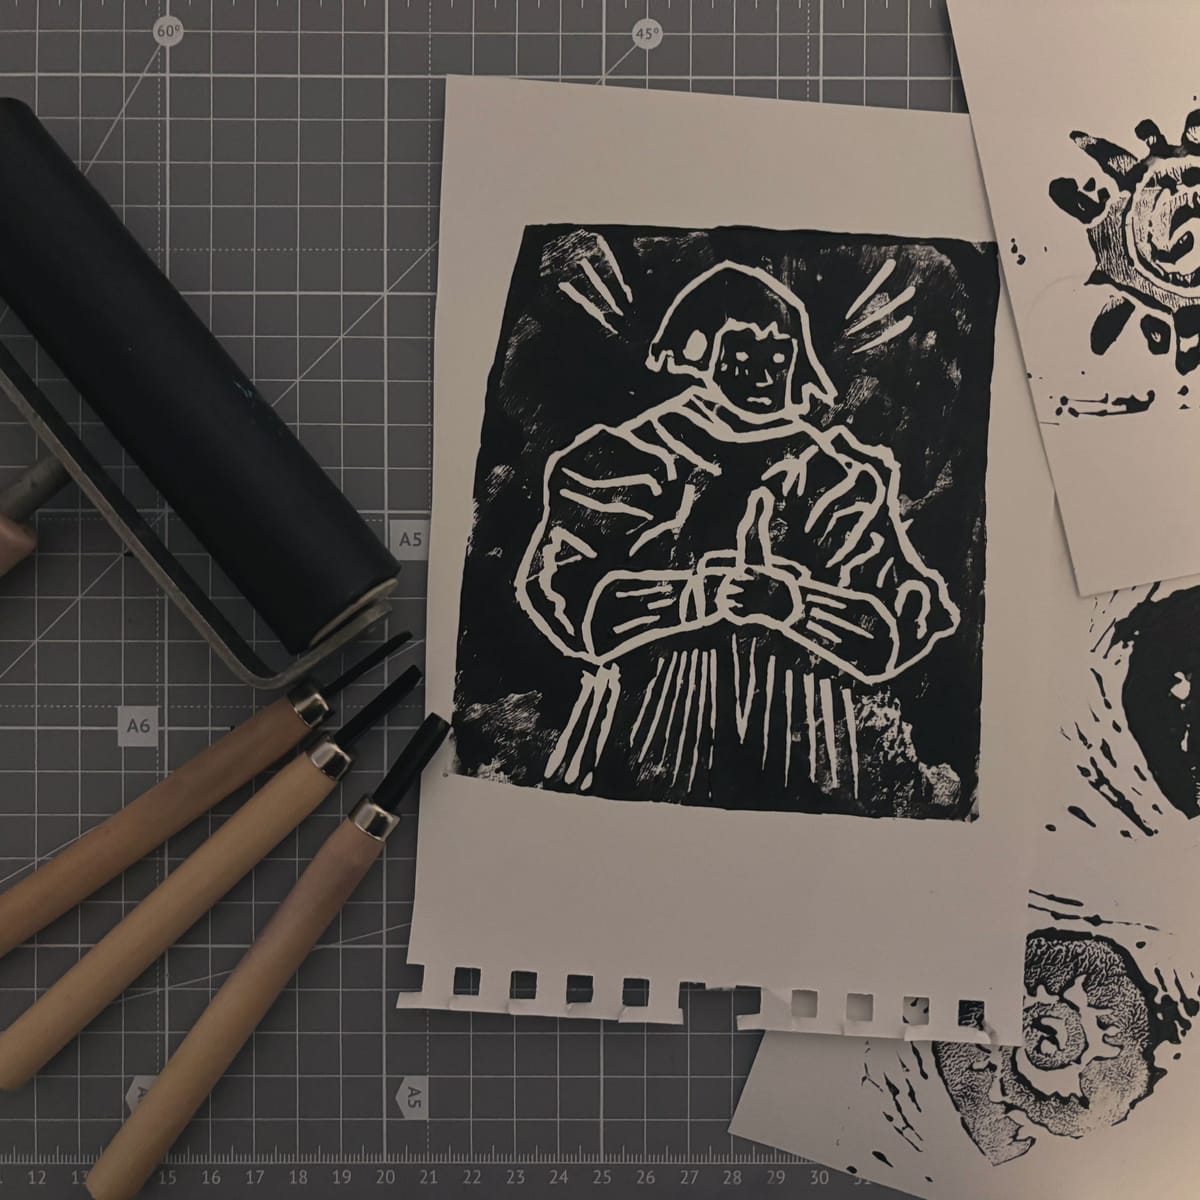
Whatever you carve away prints white. Whatever you leave behind prints black. That’s the whole point.
Keep your first design simple. Tiny details look great on paper and they’re a nightmare to carve. I tried and realized I’d need some really fine cutters and a lot of practice. It could be a buzzkiller, so I decided to move on with simpler ideas. You can find tons of nice sketches on Pinterest and just copy-transfer them onto your lino.
Mirror your design before you transfer it. If your image has any text or directional thing in it, it’ll come out backwards. Just keep that in mind.
Trace your design, flip the tracing paper over, sandwich graphite paper between it and the block, trace again with pressure. Mirrored design transfers cleanly.

Go over the lines with permanent marker once they’re on the block. They rub off as you carve and you don't want to lose your roadmap halfway through.
The carving
Always carve away from your hands. Lino tools are sharp and will absolutely slip.
Keep cuts shallow (about 1–2mm). Deeper isn’t better, because it just weakens the block and makes the carved channels collect stray ink. And yes, this was my biggest mistake and you could see how it ended on the final results.
No Ctrl+Z here. Every cut is permanent. Sometimes my cutter just went forward where it wasn’t supposed to and there’s no simple way to fix that. A bit annoying, but yeah. It’s not that easy honestly, you might spend an hour or two carving and your hands get pretty tired by the end. Feels like a workout.
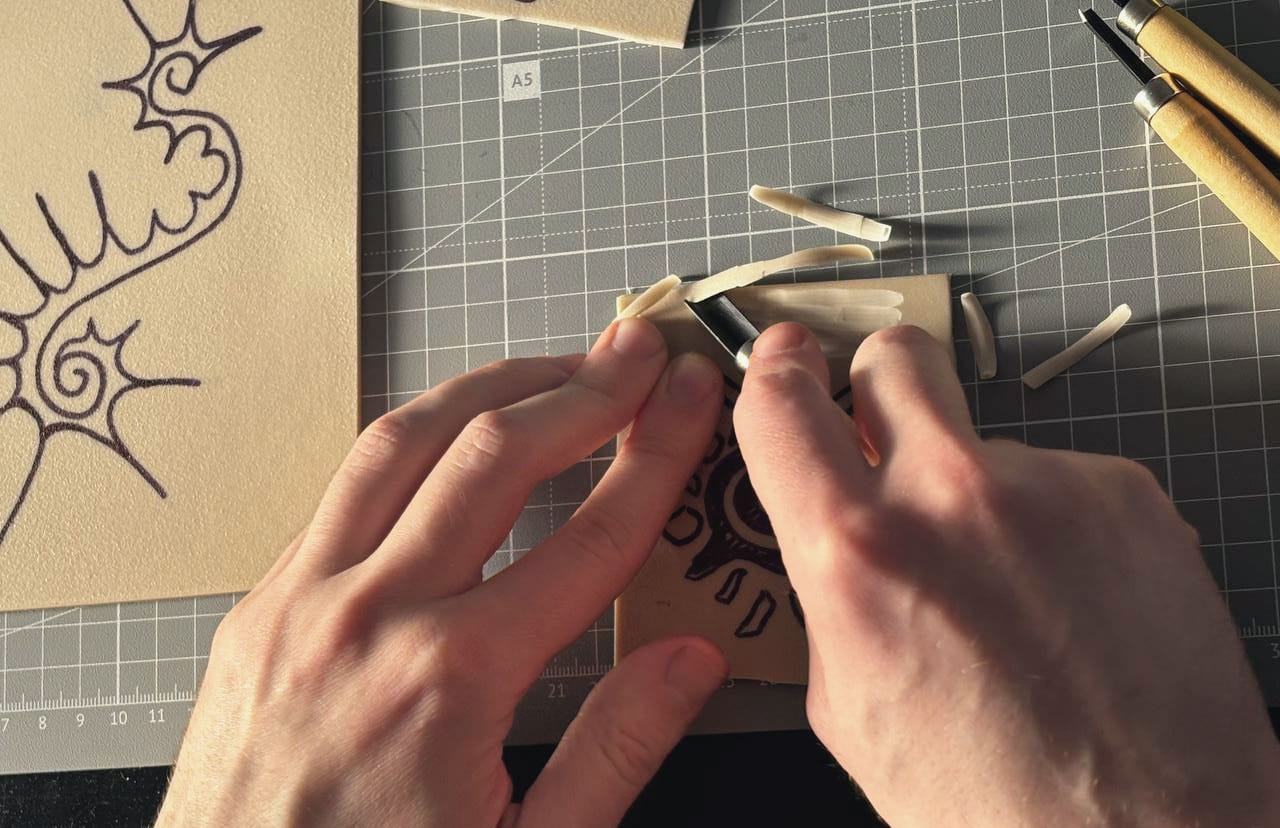
Also: pre-sand the cut edges of your lino with fine sandpaper before you start. When you cut a piece off a bigger sheet, the cut edge has a tiny raised lip that picks up ink and prints as a thin line around your image. A few seconds of sanding fixes it.
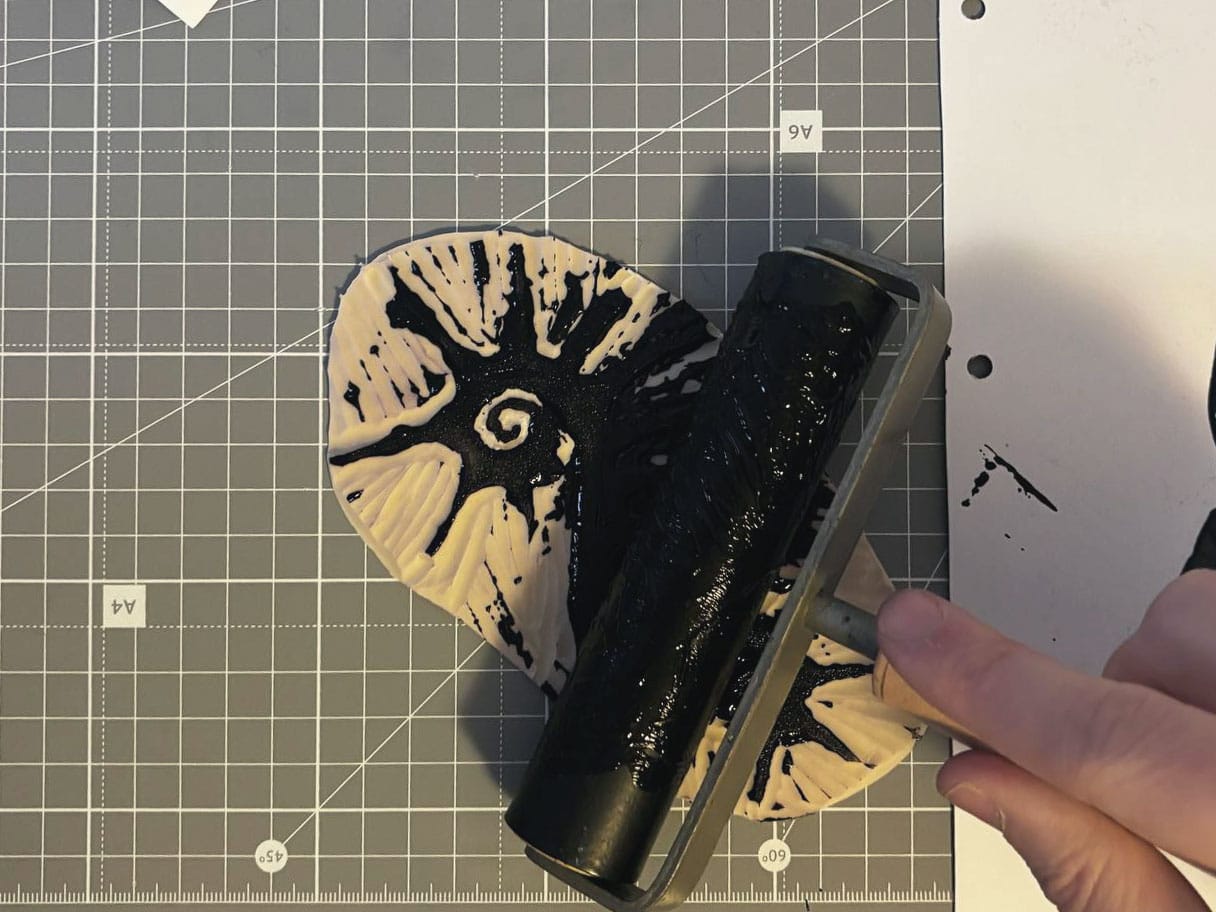
Inking
Squeeze a small amount of ink onto something flat like glass or a ceramic tile. Less than you think. Less than you’re thinking right now.
Roll the brayer through the ink, back and forth, then onto your block in different directions. You can make as many prints as you want and do it on paper, fabric, wood, whatever. I did mine on fabric too, but it didn’t really work out.
Printing without a press
This is the part everyone worries about. It’s actually the easiest step.
Hold the paper still with one hand and rub the back firmly with the other. A wooden spoon, metal spoon, even the bottom of a tub also works.
If your paper feels thin and you’re worried about tearing it, lay a sheet of printer paper on top as a buffer.
When you’ve covered the whole block, hold one corner of the print down, peel up the opposite corner slowly, and lift it clean off. The reveal is the best bit.
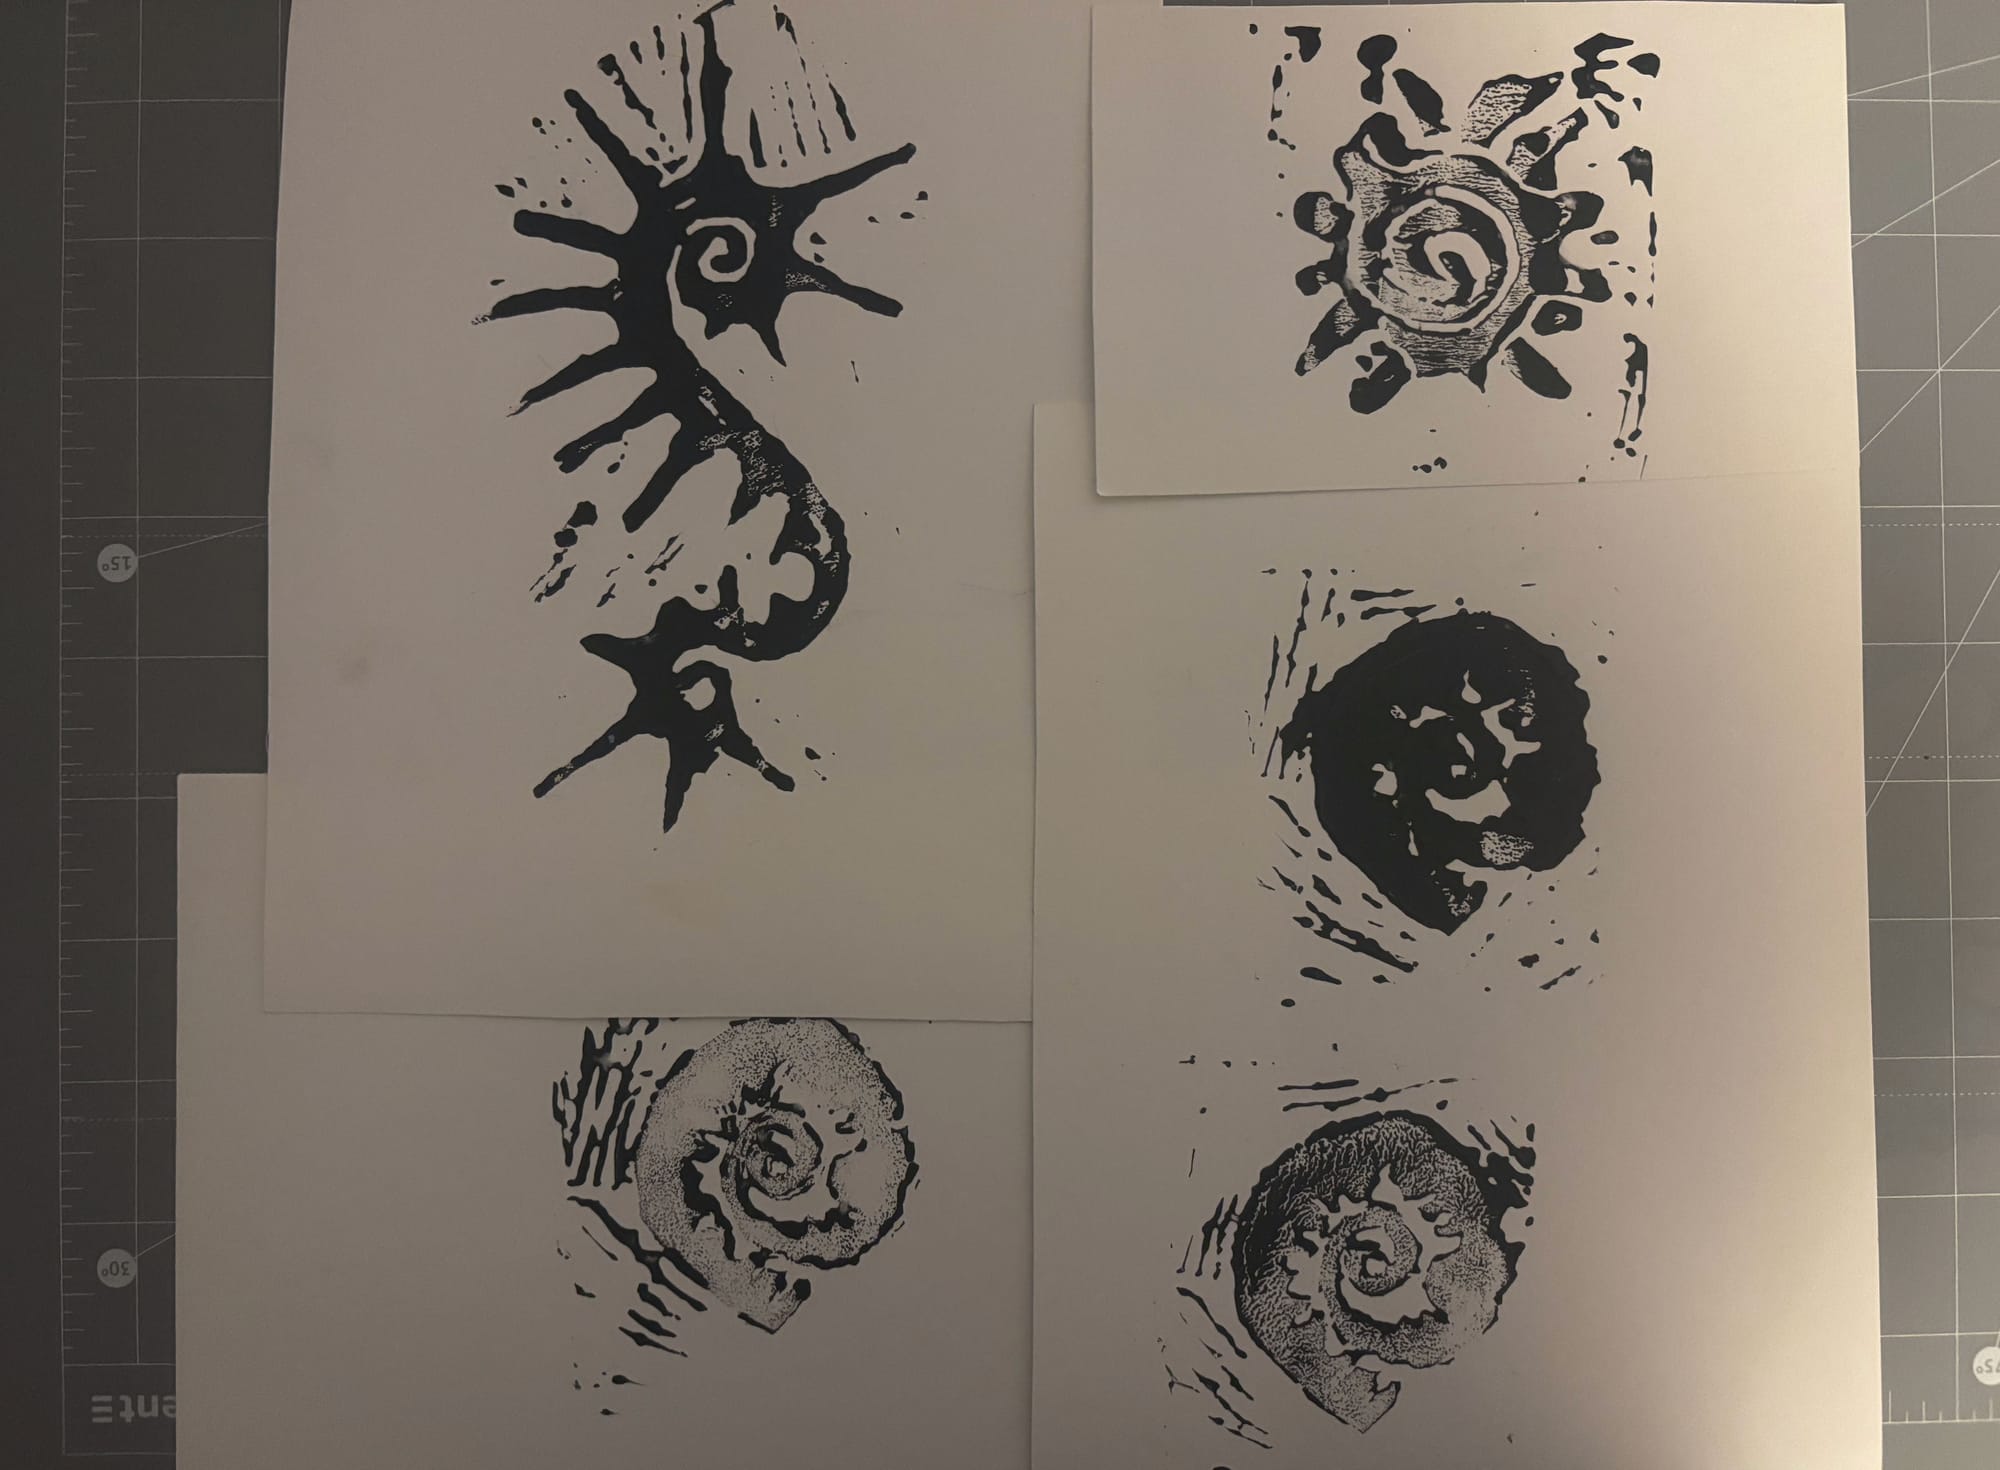
I went with these primitive/tribal-style designs you can see on the picture here. They remind me of cave paintings in a way. The cool thing about them is that it’s forgiving and if a line comes out rough or patchy, it just adds to the whole handmade vibe. I wasn’t stressing about perfect curves or tiny details at all. The whole thing took me probably 4-5 hours to finish.
If your first print looks rough, just keep it. Hand-pulled prints are supposed to have imperfections and that’s the whole point of doing it by hand. No two prints in an edition are exactly the same, which is kind of the magic of it.