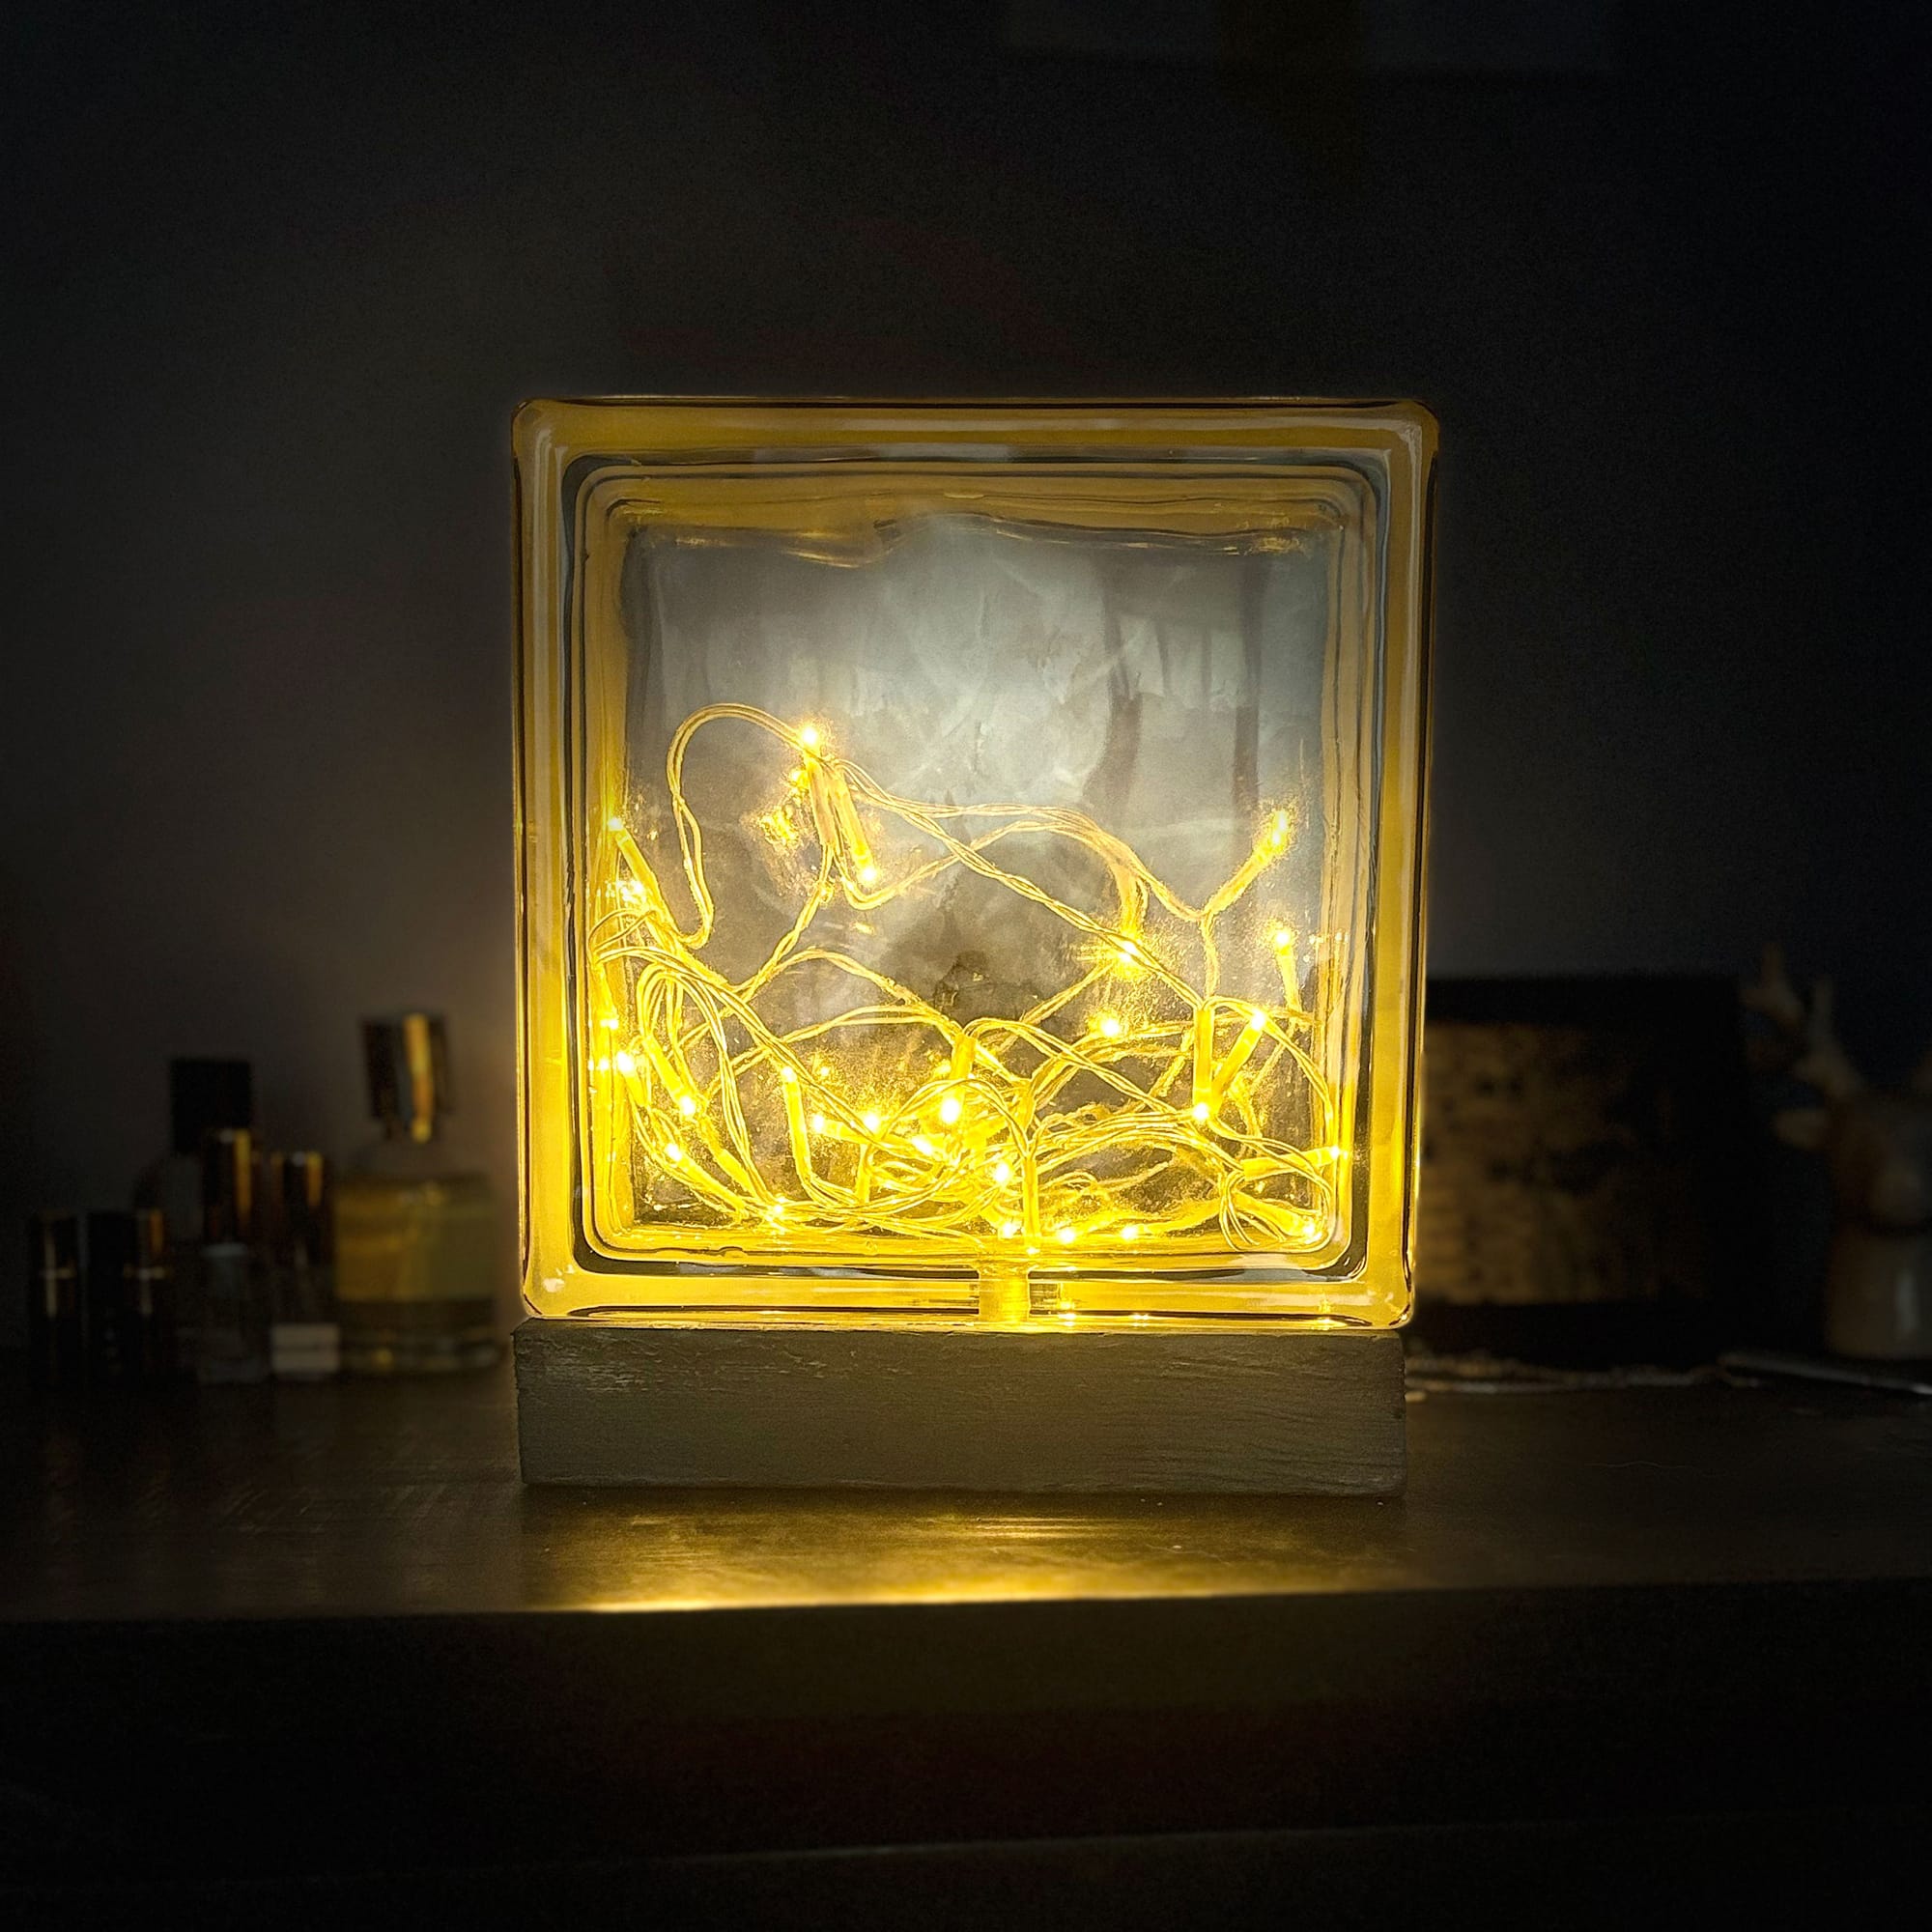
Turning a Glass Brick into a Cozy Shelf Lamp
I avoid turning on the main light as much as I can, and whenever I see an option to get a small lamp, I'm for it. So when I spotted a few glass bricks at a local building supplier, I picked one up right on the spot. After a bit of online research I found out how to make a nice lamp out of one, and I really like how cozy and clean they look in modern interiors.
One rule from the start: I need the light source to be fully replaceable, with no sealed compartments. And if a bulb dies or a battery leaks, I should be able to open it up. I found a string of fairy lights at home, so I thought it would be a good start and a test to see whether this could work as a nice night shelf lamp, because making one with a bulb and wiring would be a bigger commitment.
Materials I used
- Seves 1919/8 Wave glass brick (190 × 190 × 80 mm)
- LED fairy light garland with a 3× AA battery pack (I prefer rechargeable ones so you can just top them up instead of buying new batteries)
- A piece of wood for the base, cut to the footprint of the brick
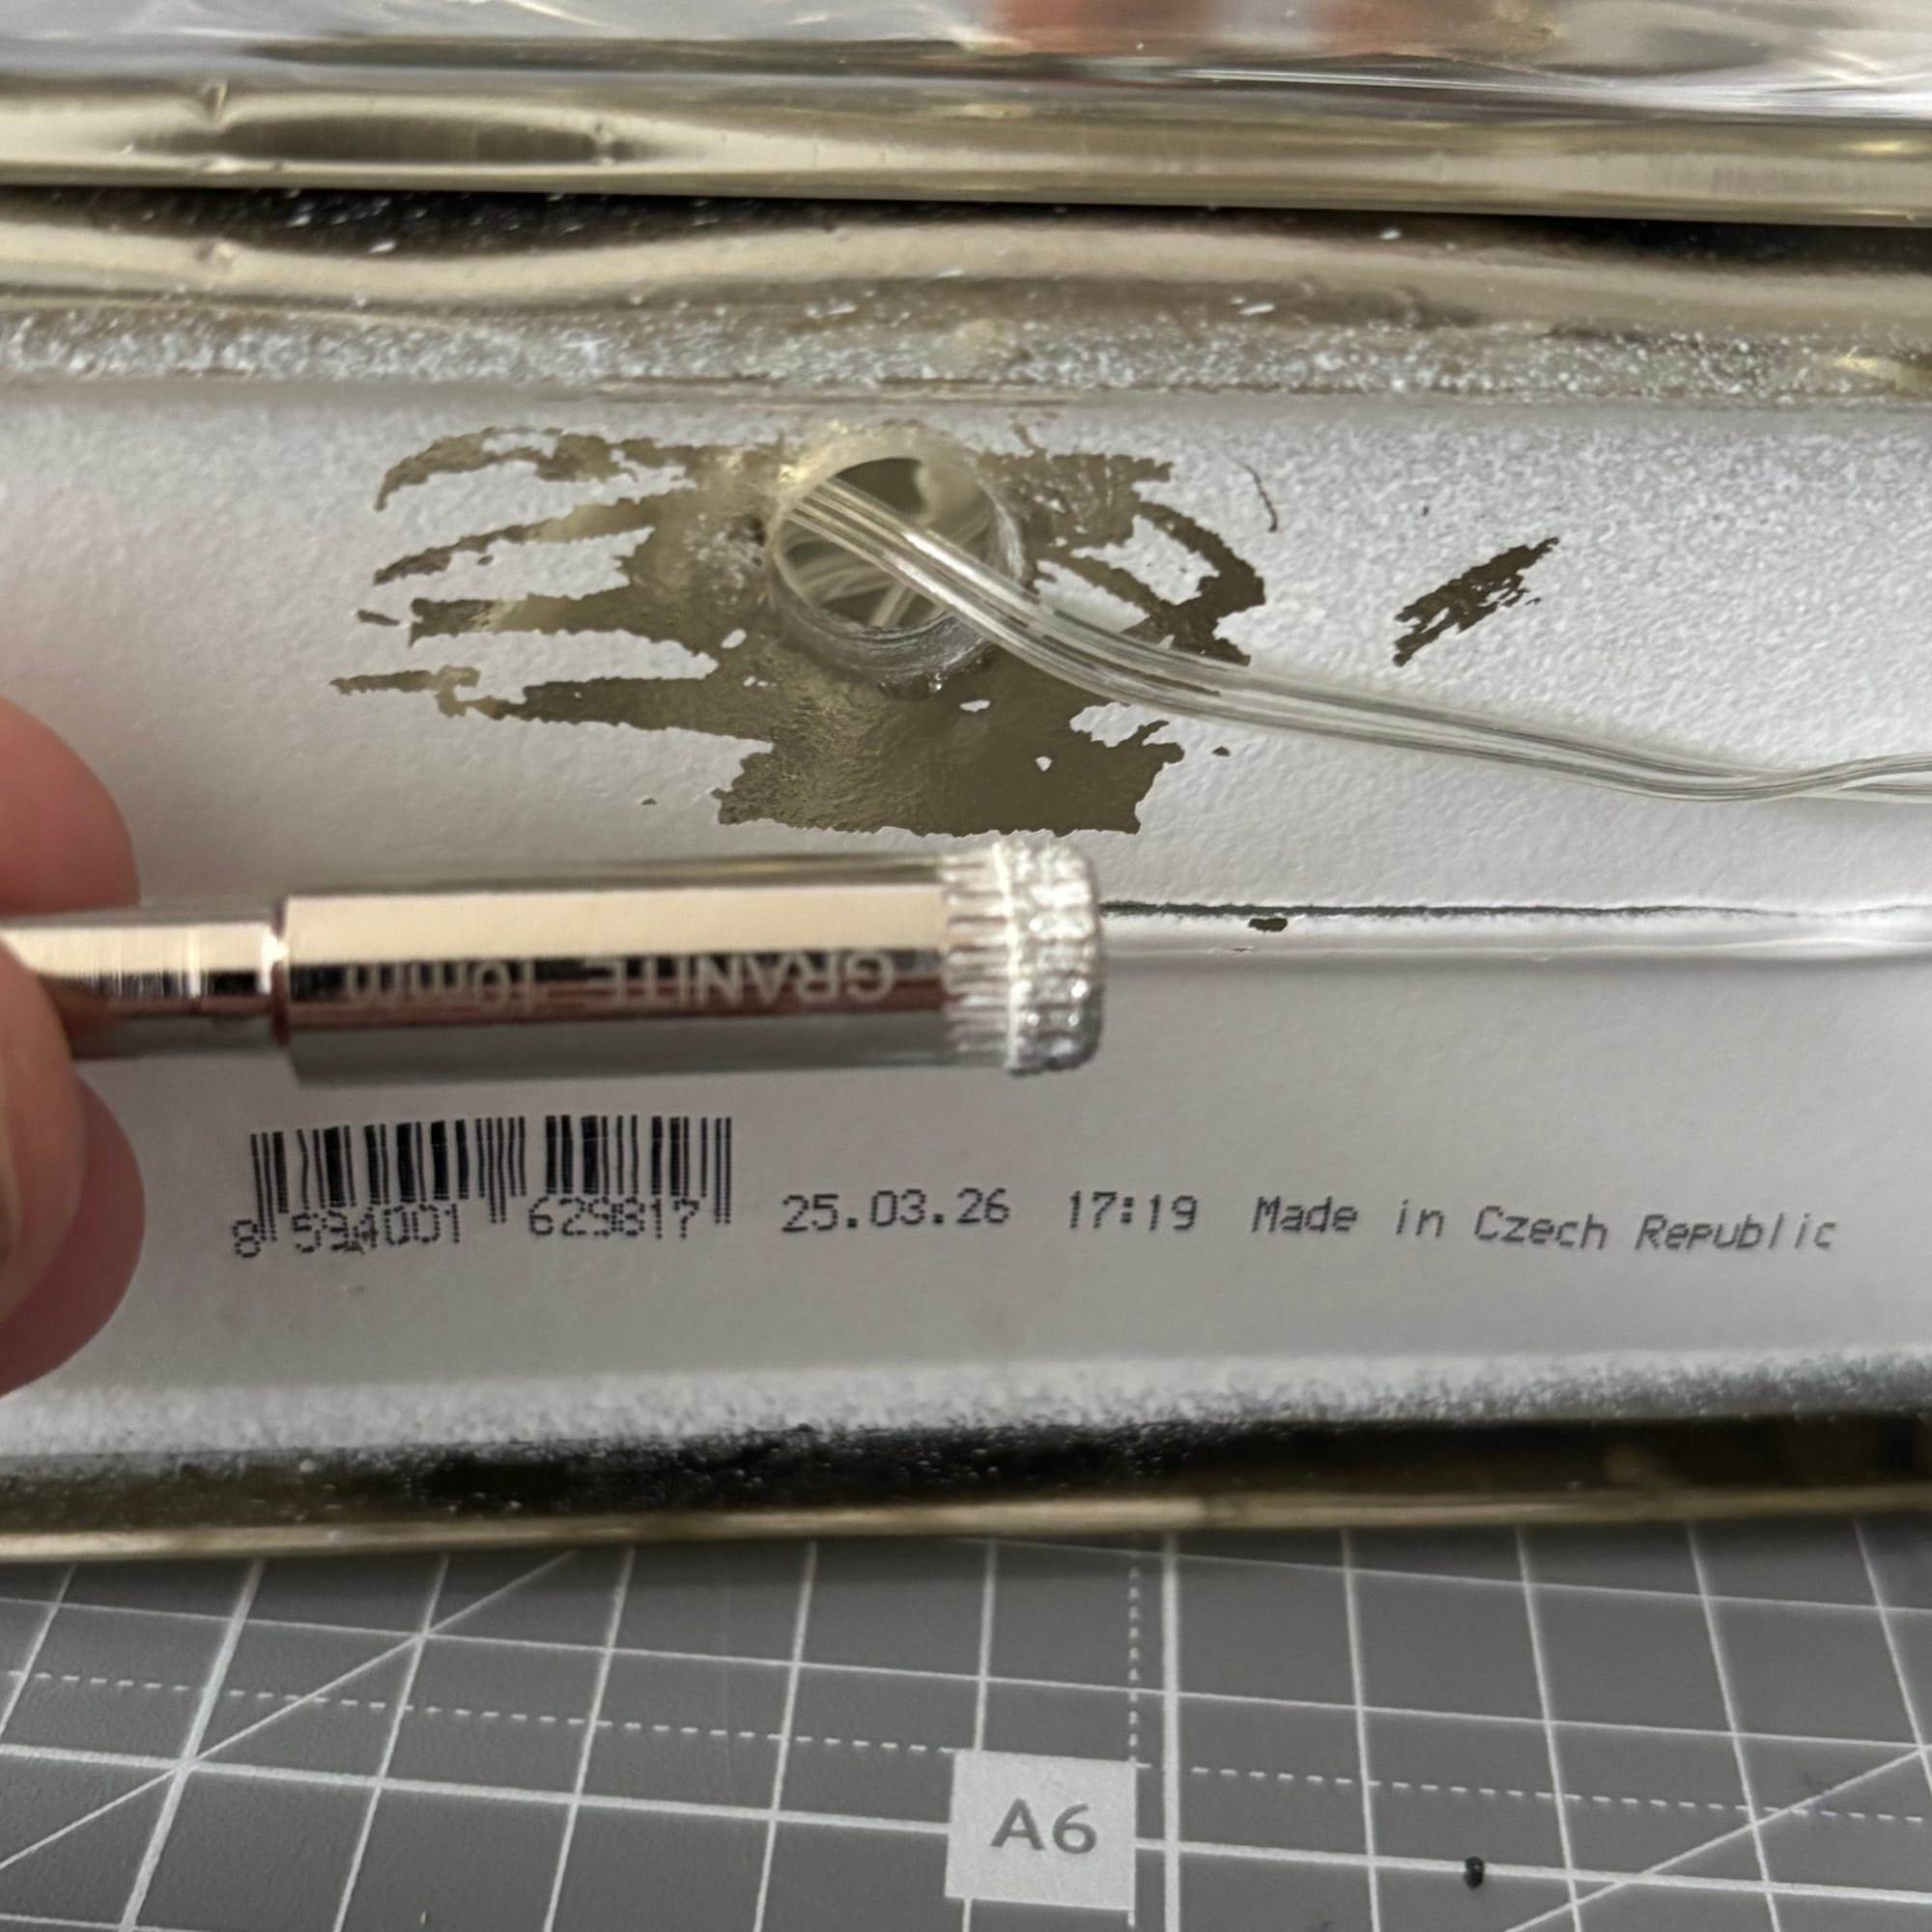
- 10 mm diamond drill bit
- Electric drill driver
The process
For my version I decided to drill a small hole in the bottom of the brick so I could push the garland through it. A diamond bit is very slippery on a smooth surface, so coming straight down at 90 degrees just skates around. Hold the drill at a slight angle instead and scratch a tiny starter groove, then slowly tilt the drill upright into that groove until the bit bites. Once it has a center, you can drill the rest of the circle.
Remember to drip water onto the spot from time to time and keep the drill on low speed. Glass overheats quickly, and it can even crack a bit. Though honestly, with walls this thick I'm not sure how real the risk is.
After the hole was through, there were little chips of glass and flecks of the paint inside the brick. I washed them out and left it in a dry spot for a few days until the inside was completely dry. I left the white factory paint on the side faces of the brick because I liked the look, but if you want a cleaner finish, a hard sponge should scrub most of it off.
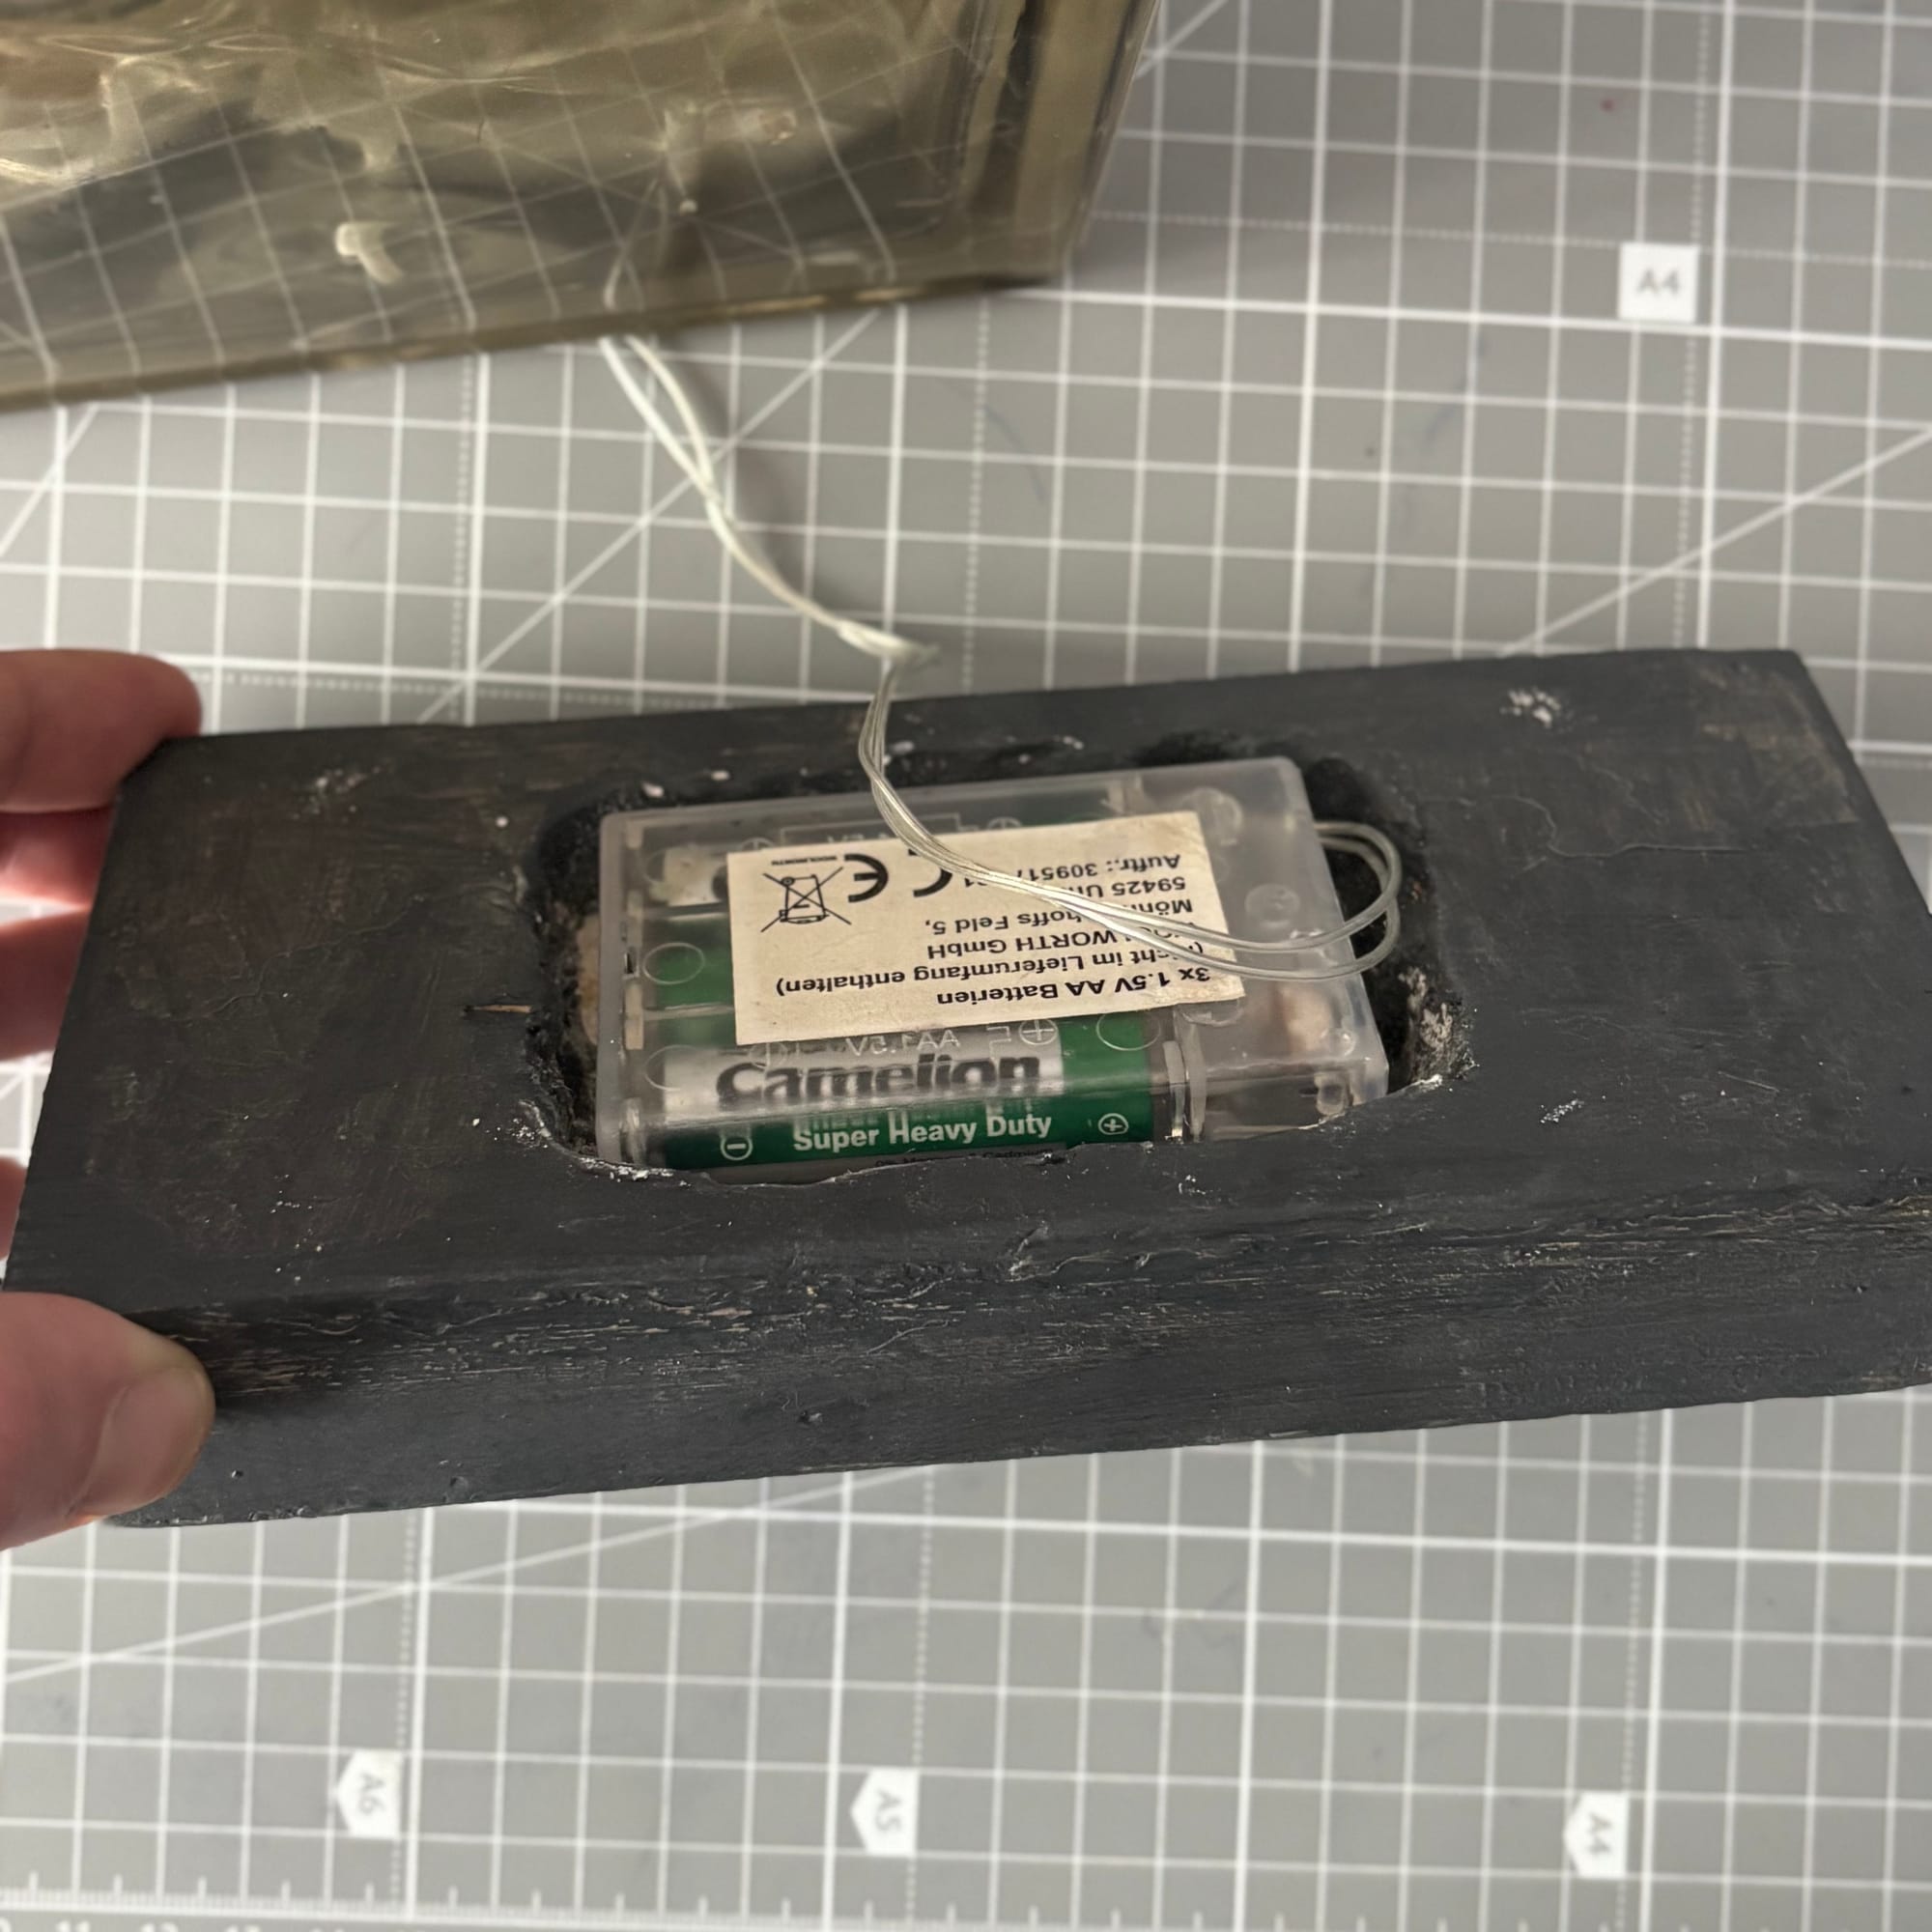
While the brick was drying, I cut a piece of wood to the size of the brick's base and drilled out a shallow pocket using a spade bit, big enough to fit the battery pack inside. That way the brick sits flat on top and the batteries are hidden underneath. I coated it with black paint, but if you prefer the natural wood look, you can just varnish it instead.
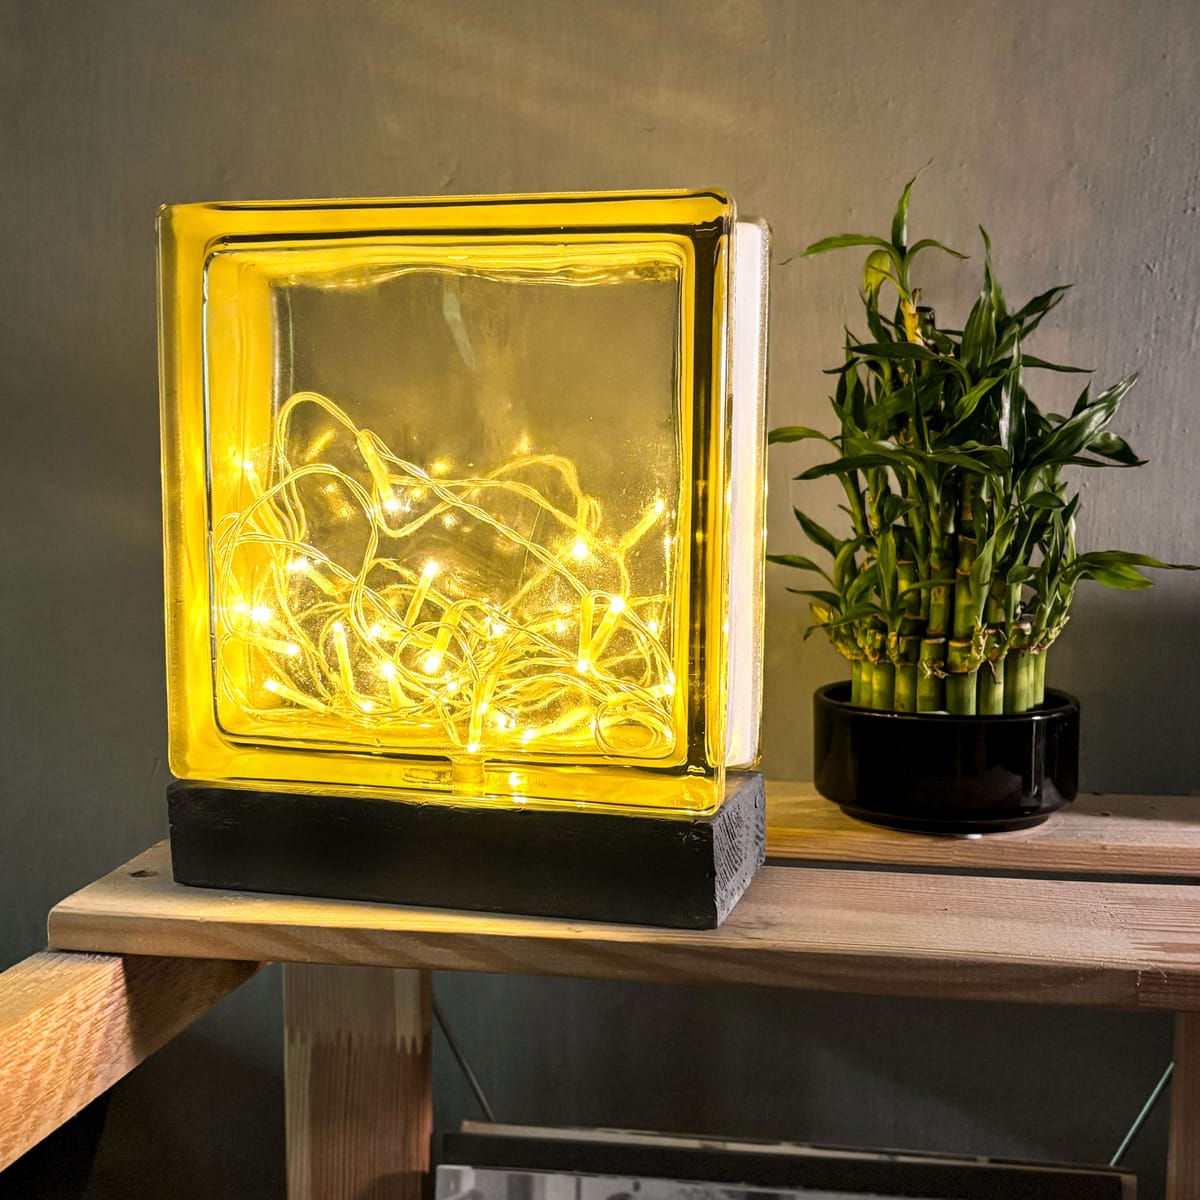
Time to place it on a shelf
When you need to replace or recharge the batteries, the brick lifts straight off and the pack swaps out. If you are buying a brick for this project, the Wave pattern diffuses the light in a really lovely way. You can try other kinds with different patterns, a different LED color, a bulb – anything you want. I hope this example is a nice starting point for you to come up with your own version and do the thing. If you already have the needed tools at home, the project is cheap and the brick cost me 7$.